Scheduling Your One-on-One Tutoring Appointment


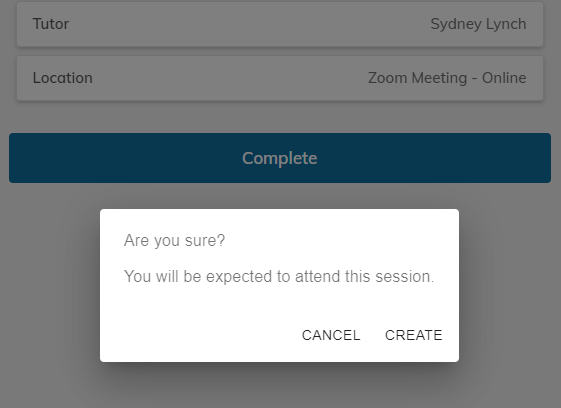
Appointments are to be scheduled online through Penji . View refer to the steps below for assistance with the online scheduling process. Make sure to review our One-on-One Policies & Guidelines prior to scheduling an appointment.

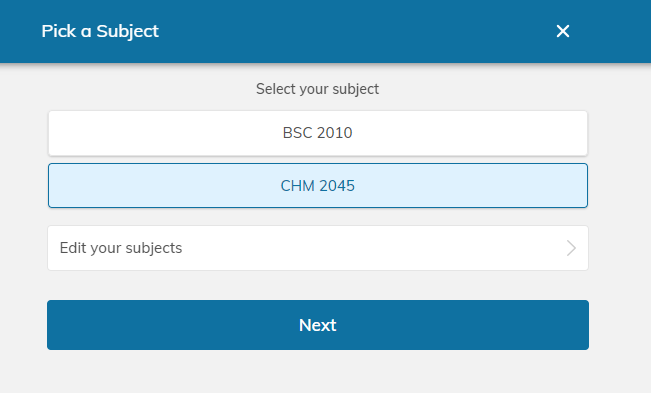
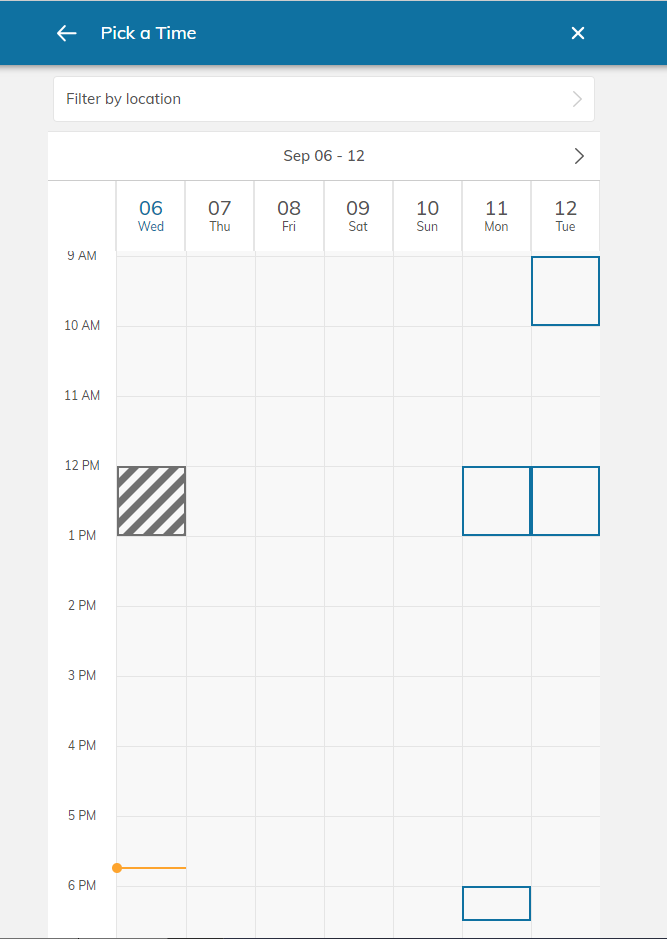
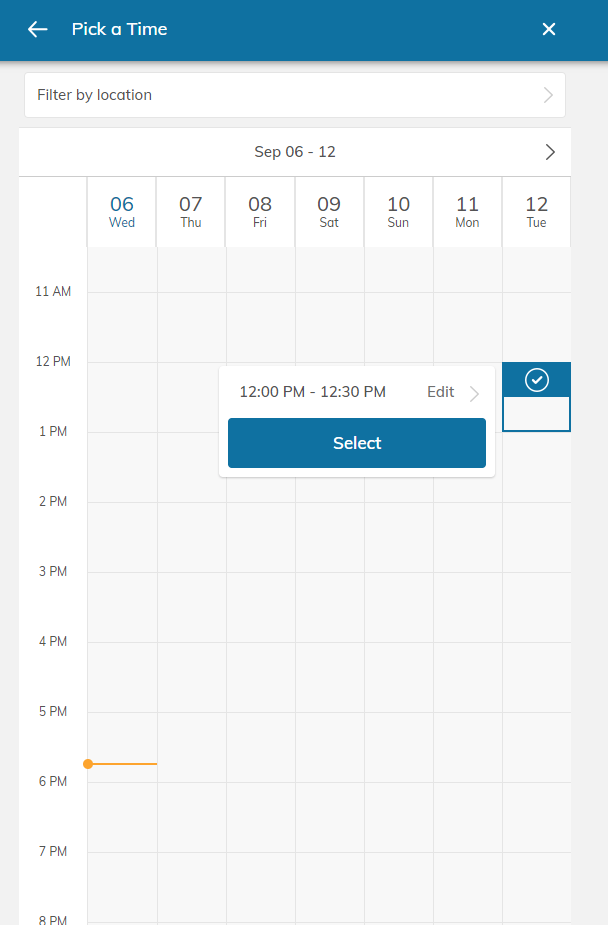
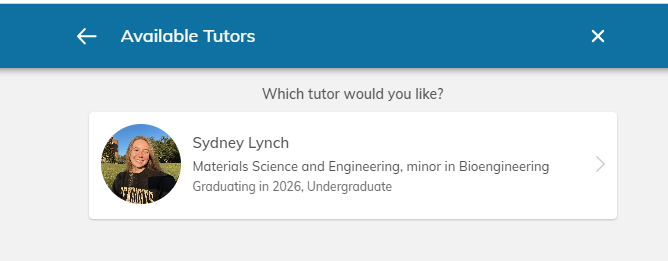
Step-by-Step Tutorial


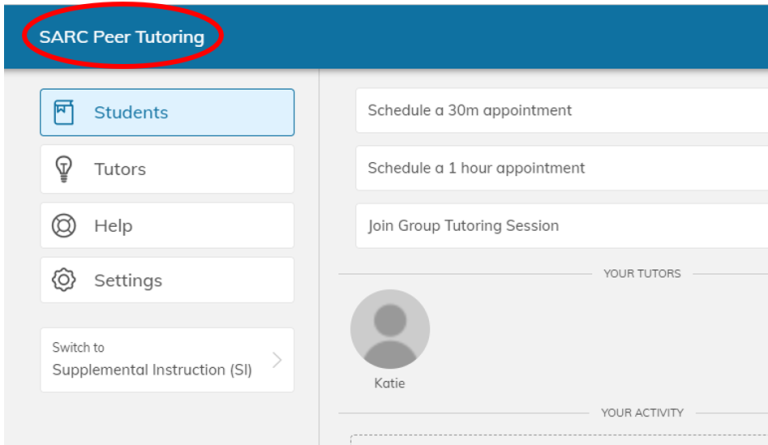
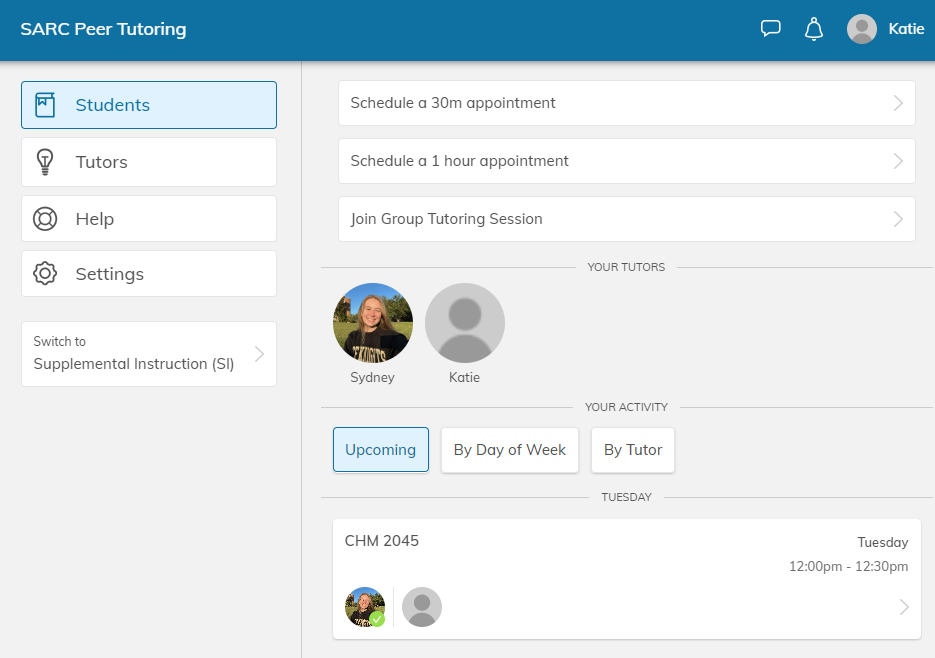
  1. Access the Peer Tutoring Community on the Penji app or through web.penjiapp.com/schools/ucf/communities/sarc-peer-tutoring 
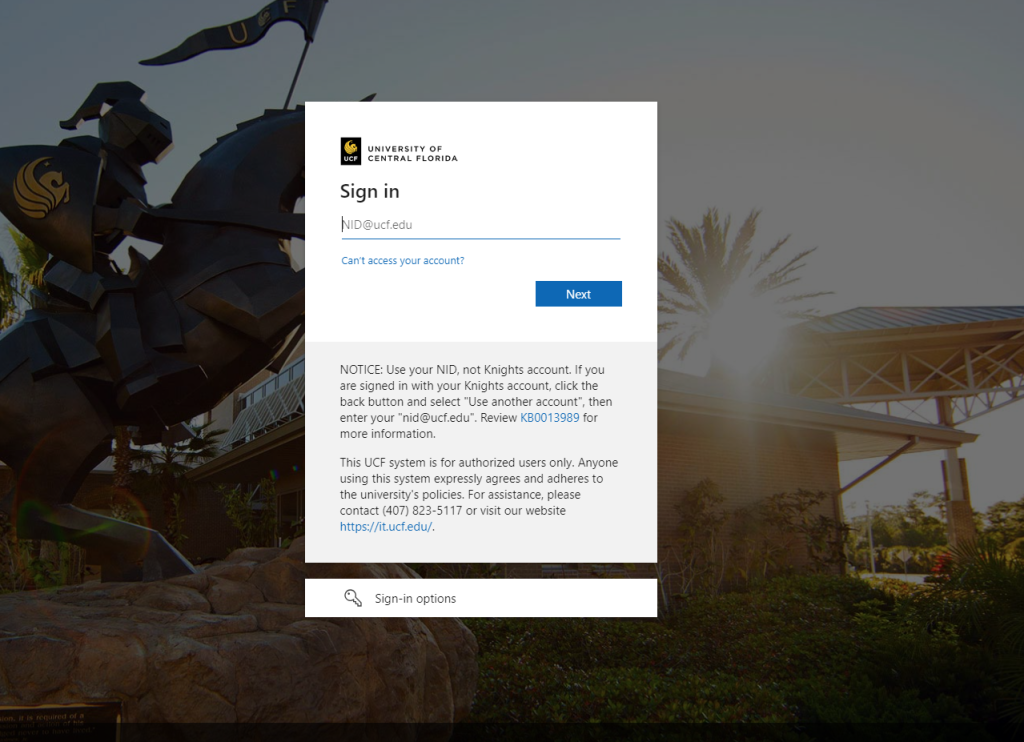
      1. Log in to your Penji account using your UCF email (NID@ucf.edu) and NID password to access your Student page.
      2. If you are logging in for the first time, you may receive a prompt indicating that you don’t have an account, please click through this prompt using either “Continue” or “Cancel” and your account should generate.
        • If this is your first time, your settings page will be your first screen, make sure to enter your first and last name. You can edit the other items by selecting your name in the upper Right Hand corner and selecting “View Profile” anytime.

View from web.penjiapp.com

View from a web.penjiapp.com/schools/ucf

  1. Navigating Penji
    1. Make sure your are in the correct community. To schedule a One-on-One Tutoring appointment, SARC Peer Tutoring should be the title in the top blue banner.
    2. If you are in another community, switch to the SARC Peer Tutoring Community by selecting from the options below “Settings” on the Left.
  1. Schedule Appointment
    1. Select the type of appointment you would like to schedule.
      • Schedule a 30m appointment
      • Schedule a 1 hour appointment
  2. Select your Subject
    1. Select the type of appointment you would like to schedule.
      1. If this is your first time (left below) or you are looking for a different subject, you will want to select “Join a Subject” and select the course or subject you are seeking support for. Any added subjects will appear on this screen for quick selection later (right below).
      2. If you are looking to schedule an appointment in a subject that you have already joined (right below), then you would select from the subjects that appear.
  1. Select the time for your appointment.
    1.  Once you have selected your subject, a calendar with blue blocks indicating when tutors have availability for One-on-One times.
    2. Then select within the open block of the day and time that you are looking to book. Dashed boxes are blocked off time and are unavailable, typically available.
    3. If the selection is not the time or day that you are looking for, select outside the current selection.
    4. If ONLY the time is incorrect, you can select “Edit” and adjust the clock to your desired time. If you select a time outside the opening, the selection will NOT update to the adjusted time.
    5. NOTE: Limited appointment times are available for all subjects. The open times are reflected of staff availability and any appointments already booked for the week. 
  1. Select your Tutor
    1. Once you select your time, the following screen will display the tutor(s) available at that time.
    2. Click on the Tutor and then confirm by selecting “Select”
  1. Select your Location
    1. Once you select your tutor, a Location page will display. Click from the options that display. NOTE: Currently One-on-One’s are held online, thus “Zoom Meeting – Online” is the ONLY option.
  1. Fill in the following Agenda prompt – Indicating what topic(s) or question(s) you would like to cover in the session.
  1. You will then be come to an Overview page for the appointment you are attempting to schedule. 
    1. Make sure that the appointment information is correct. Then select Complete. 
    2. You will then be asked to confirm. To finalize, select Create. If you do not select Create, the appointment will not be scheduled and you may forfeit that time.
  1. Your appointment has now been created and will show up on your Student page in the Peer Tutoring Community.
  1. When it comes time for your appointment, log back into Penji and select the appointment. To access the appointment Select “Open in Zoom” to join the session online. If you are having any issues entering the Zoom session, make sure that you are logged into UCF Zoom through the ucf.zoom.us and try selecting “Open in Zoom” again.
    1. If you are experiencing technical difficulties, please make sure that you reach out to the tutor as soon as possible in order to navigate the situation and avoid the 15-minute policy. 

If something happens and you can no longer make the session, please cancel! 

If you need to cancel:

 
  1. To cancel, from the Student page, select the session you are trying to cancel. 
  2. From the informational page, select the 3 dots in the top bar, right of “Session Details”.
  1. The following options will then display
    • Report a problem
    • FAQ
    • Cancel Session
  2. Once you select “Cancel Session”, please enter the reason for cancelling the session. And then select Cancel Session, below.